Conversica gives you the flexibility to create your own custom reports so you can report on the data you want to see when you want to see it. There are two ways to create custom reports. You can build a new report from scratch or customize an existing preset report to make a new report.
Before You Get Started
Here are some important things to know about this feature before you get started:
- User Permissions: Custom reports is available to users with permissions to access the Reporting module in Conversica's dashboard.
- Plan Availability: Custom reports is available on all plans and editions.
- Visibility: Saved reports can only be viewed by the user who created them. They are not currently visible to other users on the account.
- Eligible Preset Reports: Any of the out-of-the-box reports that come with Conversica can be customized with the exception of events reports (e.g., Sales, Opportunities, or Closed ROs).
- Limitations: Custom reports is not available in group dashboards as the Reporting module is not currently supported in the group dashboard. However, group dashboard users will have the ability to create custom reports by jumping into specific accounts and accessing the Reporting module for the individual account.
Customize a Preset Report
- Navigate to the Reporting module in Conversica's dashboard.
- Select an eligible preset report from the drop-down menu.

-
-
-
-
-
-
- Add filters to organize your data to your liking.
-
-
-
-
-
- Click Advanced Filters and Configuration to change how your data appears along the X-axis and Y-axis.
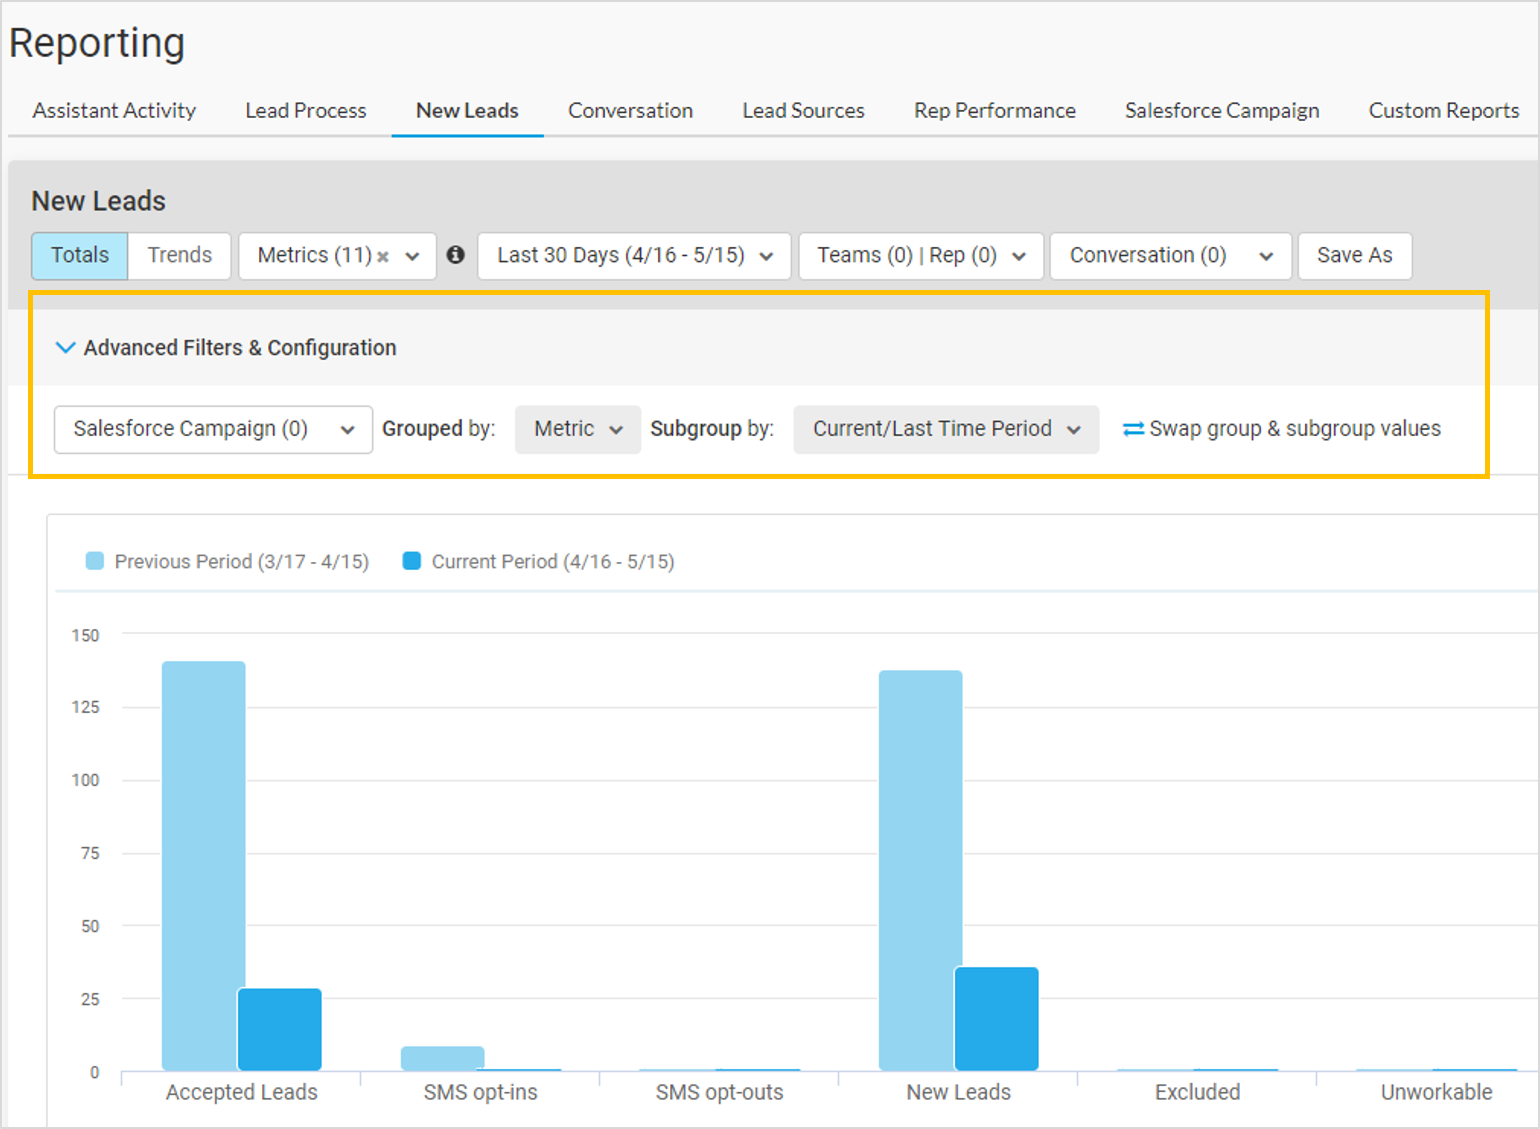

- You can further analyze your data by viewing the totals in the table below the graph. Select or deslect metrics within the table to change what is displayed in the report's graph.

- Once you are satisfied with your changes, click Save As.

- The Save As Custom Report message appears. From here you can:
- Name the report. The report will auto-populate with the name of the preset report you selected, but you can rename it by typing the name of your choice.
- Choose the date range. By default, the report is set to save the date range that was applied when you clicked Save As. If you deselect Save with the currently selected date range, the report will be saved without a date range. When you reopen the report, it will display whichever date range you last entered.
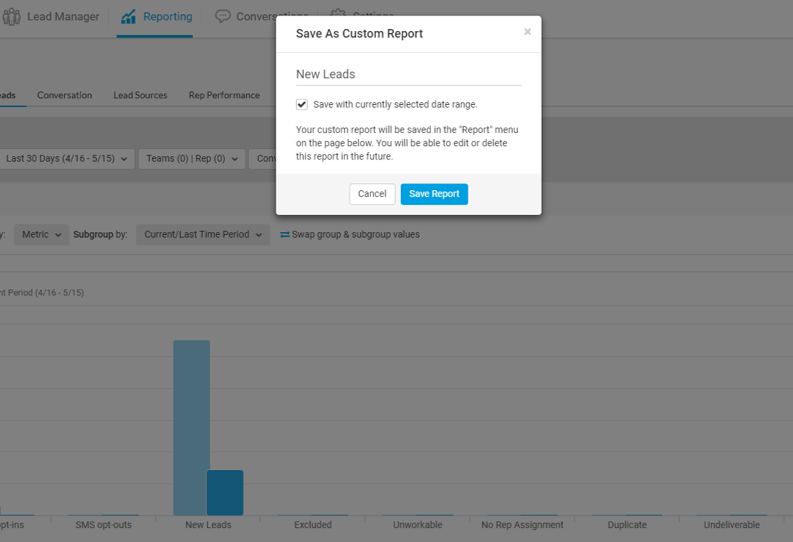
- Click Save Report. Your custom report will be saved in the "Report" menu on the page below. You will be able to edit or delete this report in the future.
Build a New Report From Scratch
- Navigate to the Reporting module in Conversica's dashboard.
- Select Custom Reports from the drop-down menu. This will automatically take you to the last custom report you've viewed.
Note: If you have not previously saved a custom report, you will need to customize a preset report and save it. Once you have saved a report, you will be able to build a new report from scratch directly from the Custom Reports tab.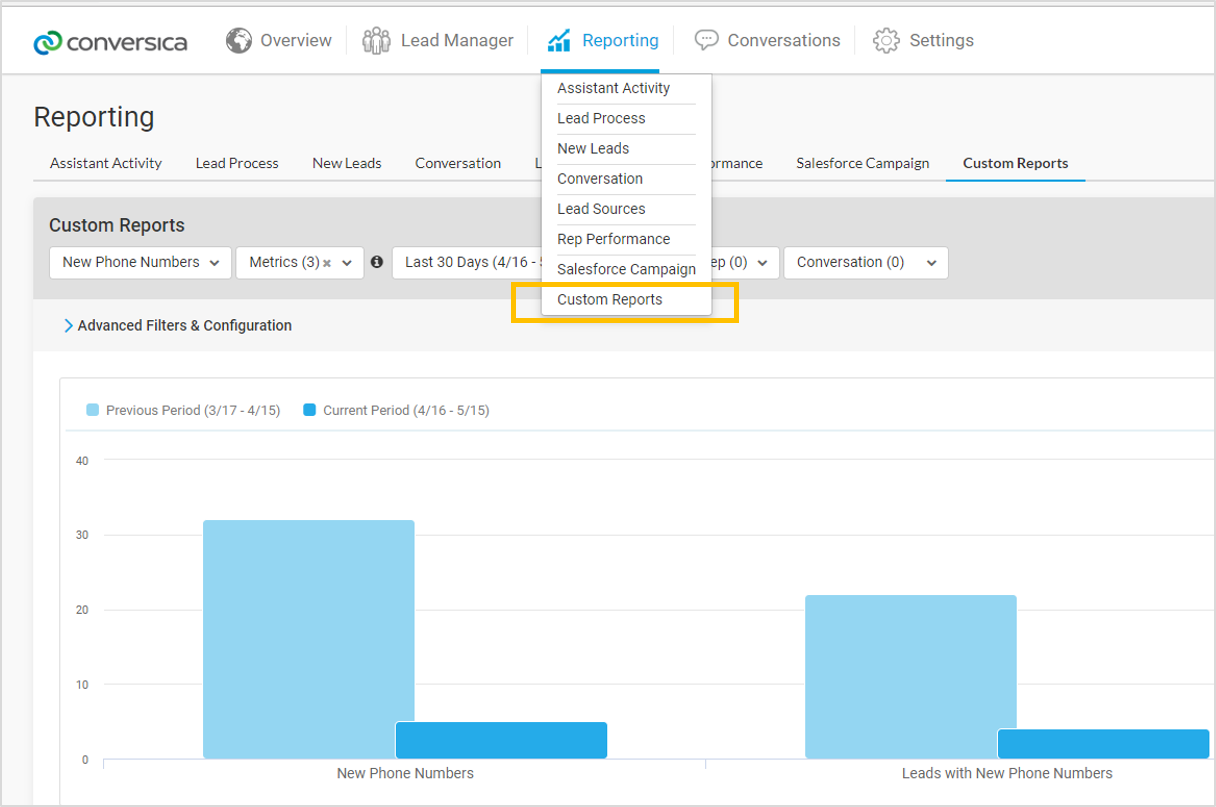
- Click the Reports menu and select Create New Custom Report.
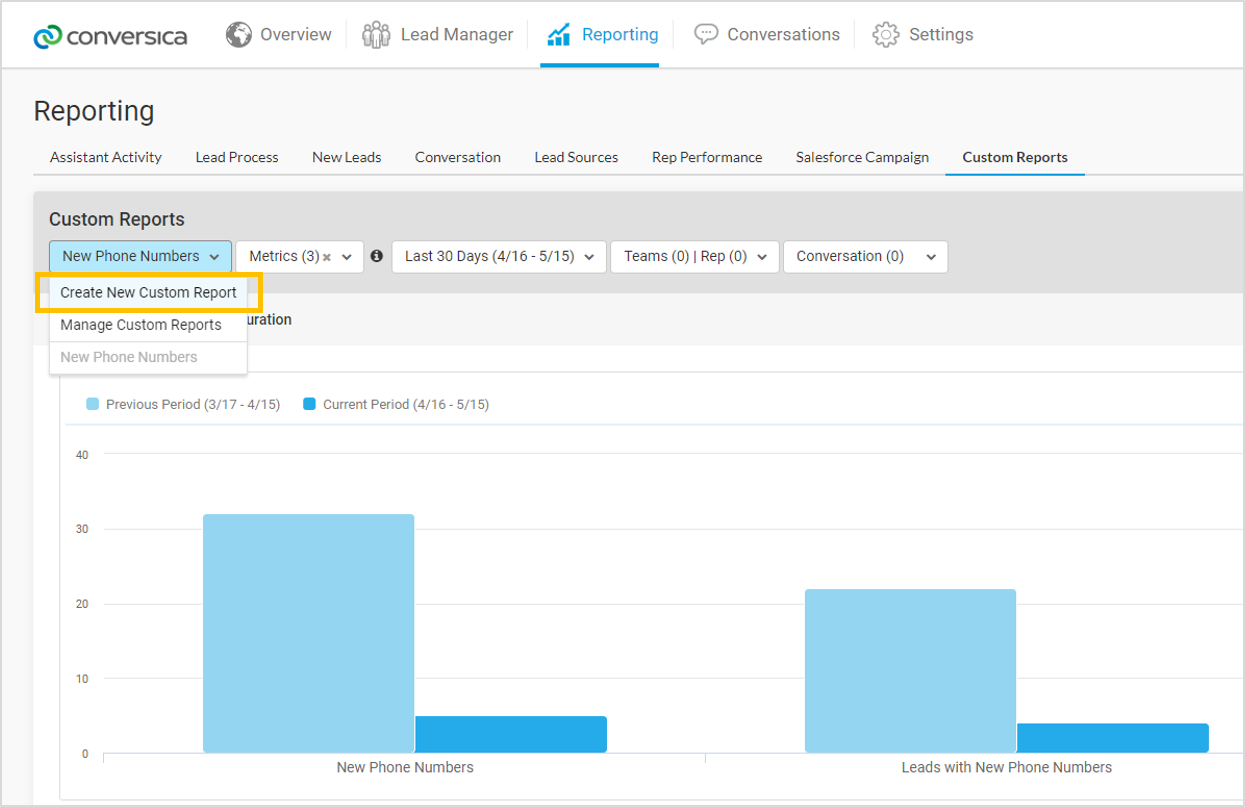
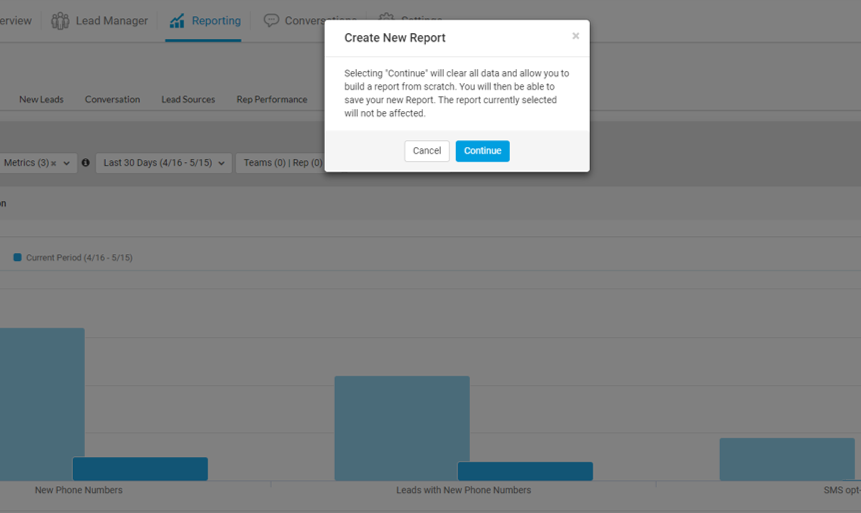
- The Create New Report message appears to inform you that clicking "Continue" will clear all data and allow you to build a report from scratch. You will then be able to save your new Report. The report currently selected will not be affected. Click Continue.
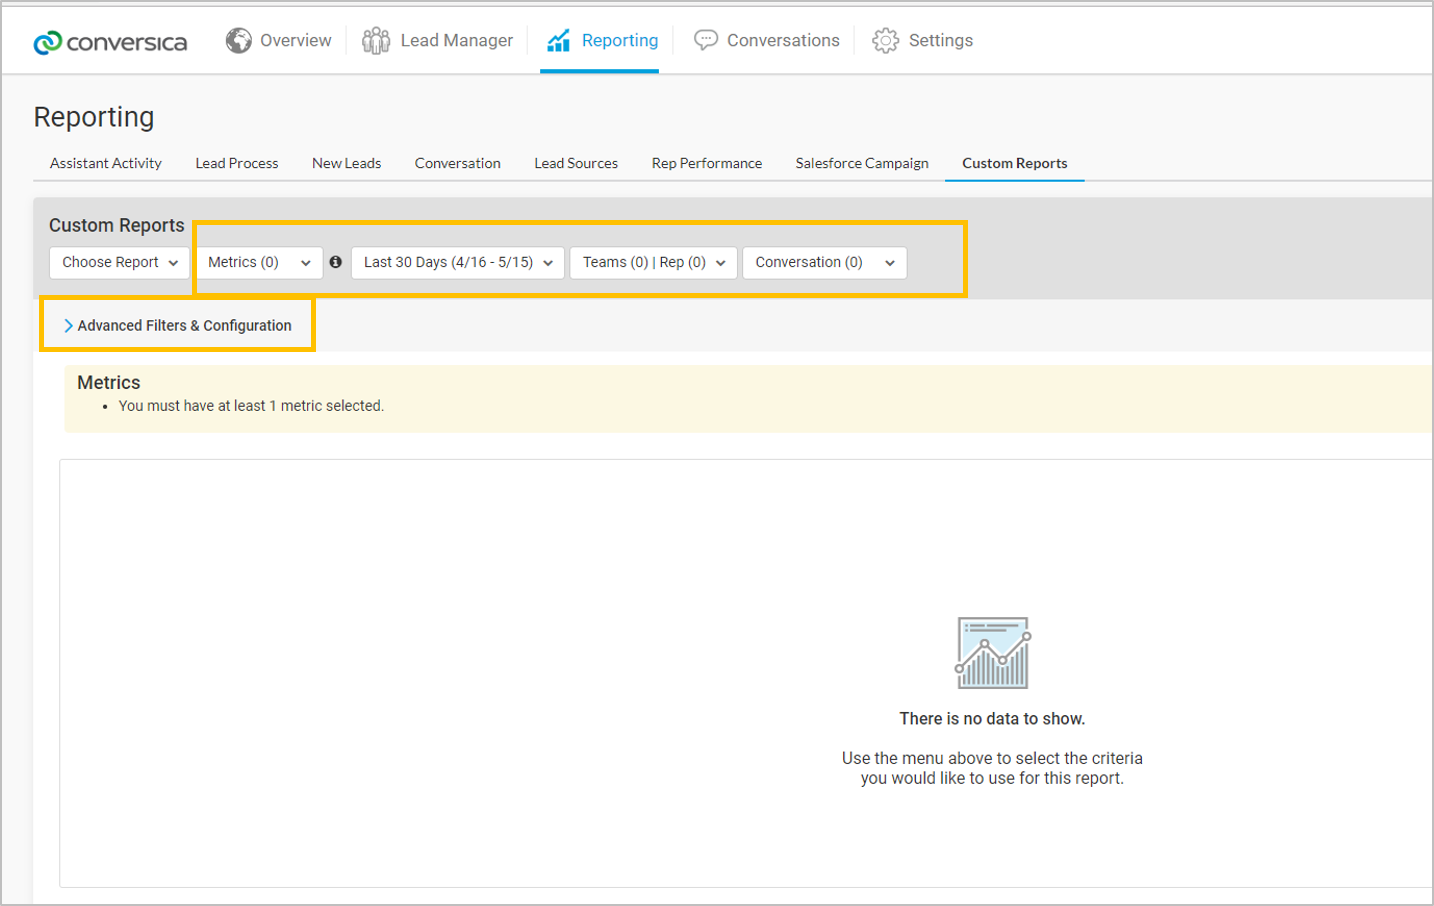
- The report will be completely blank. Select the metrics you wish to report on and add filters to organize your data to your liking.
- Click Advanced Filters and Configuration to change how your data appears along the X-axis and Y-axis.
- Once you are satisfied with your customizations, click Save As.

- The Save As Custom Report message appears. From here you can:
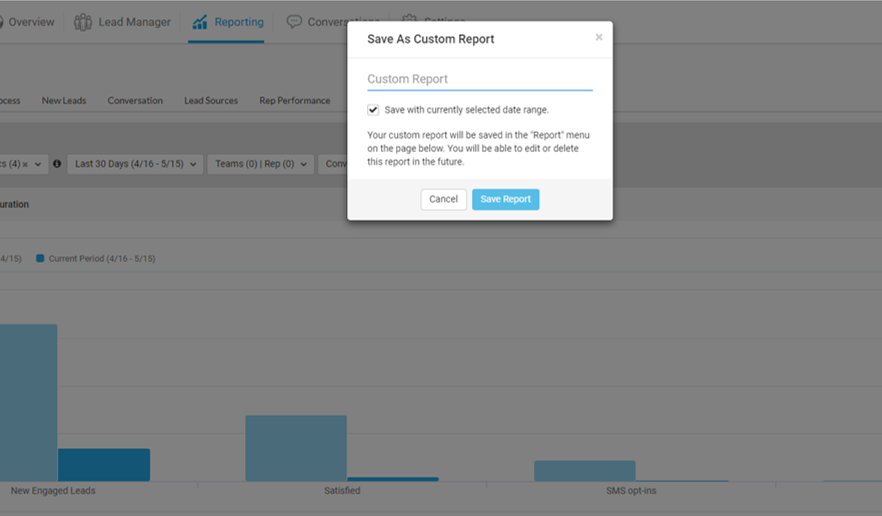
- Type in the name of the report.
- Choose the date range. By default, the report is set to save the date range that was applied when you clicked Save As. If you deselect Save with the currently selected date range, the report will be saved without a date range. When you reopen the report, it will display whichever date range you last entered.
- Click Save Report. Your custom report will be saved in the "Report" menu on the page below. You will be able to edit or delete this report in the future.
Add Filters
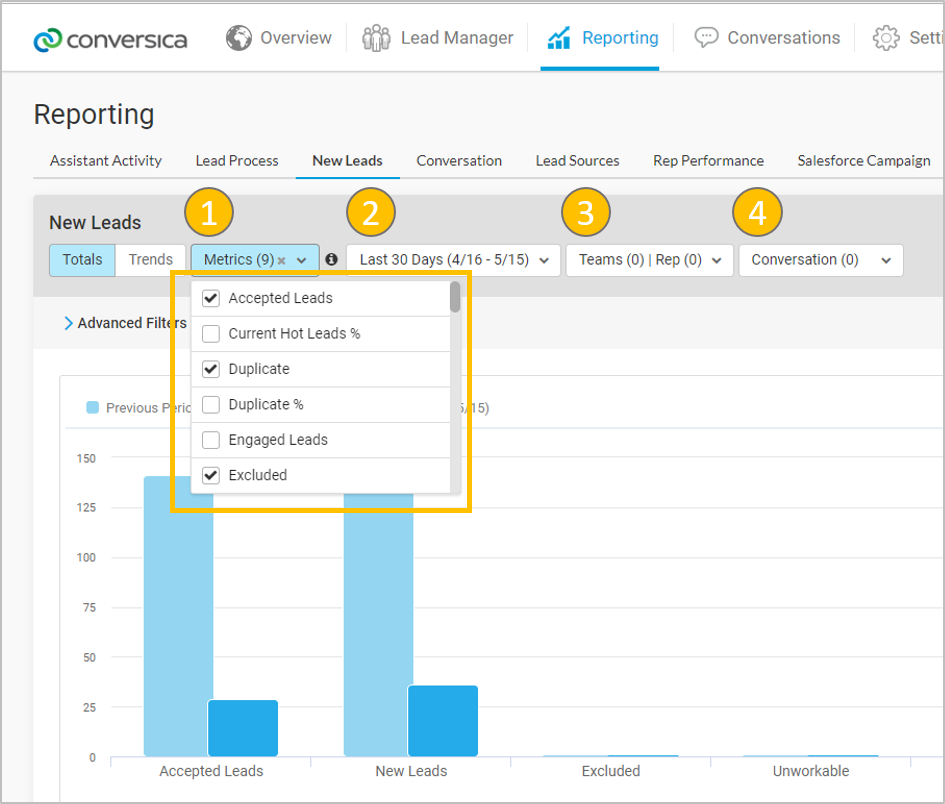
Below is a description of each filter that can be applied to a custom report.
- Metrics: Select the metrics you want to apply from this menu. If you're customizing a preset report, the standard metrics are selected by default, but they can be deselected at any time.
- Click
 to see a definition of each available metric.
 - Click X to deslect all the default metrics in a preset report.

- Date Range: Select the date range you want to review. The default date range is set to the last 30 days.
- Users: Filter the report by individual reps or teams.
- Conversation: Filter the report by a specific conversation(s).
Advanced Filters & Configuration
The Advanced Filters & Configuration help you control how your data appears on the X-axis and Y-axis.
- Grouped by: controls which metrics appear along the X-axis.
- Subgroup by: allows you to subgroup different values within the report.
- Swap group & subgroup values changes your view by transposing the values that appear on the X-axis.
Pro Tip: If Metrics is the Grouped by value and Current/Last Time Period is the subgroup by value, you can create a trends view of a report when you click Swap group & subgroup values.
Manage Reports
Once a custom report is saved, you can delete it or edit to make changes.
To Delete a Report:
- Navigate to the Reporting module in Conversica's dashboard.
- Select Custom Reports from the drop-down menu. This will automatically take you to the last custom report you've viewed.
- Navigate to the Report menu and select Manage Custom Reports.

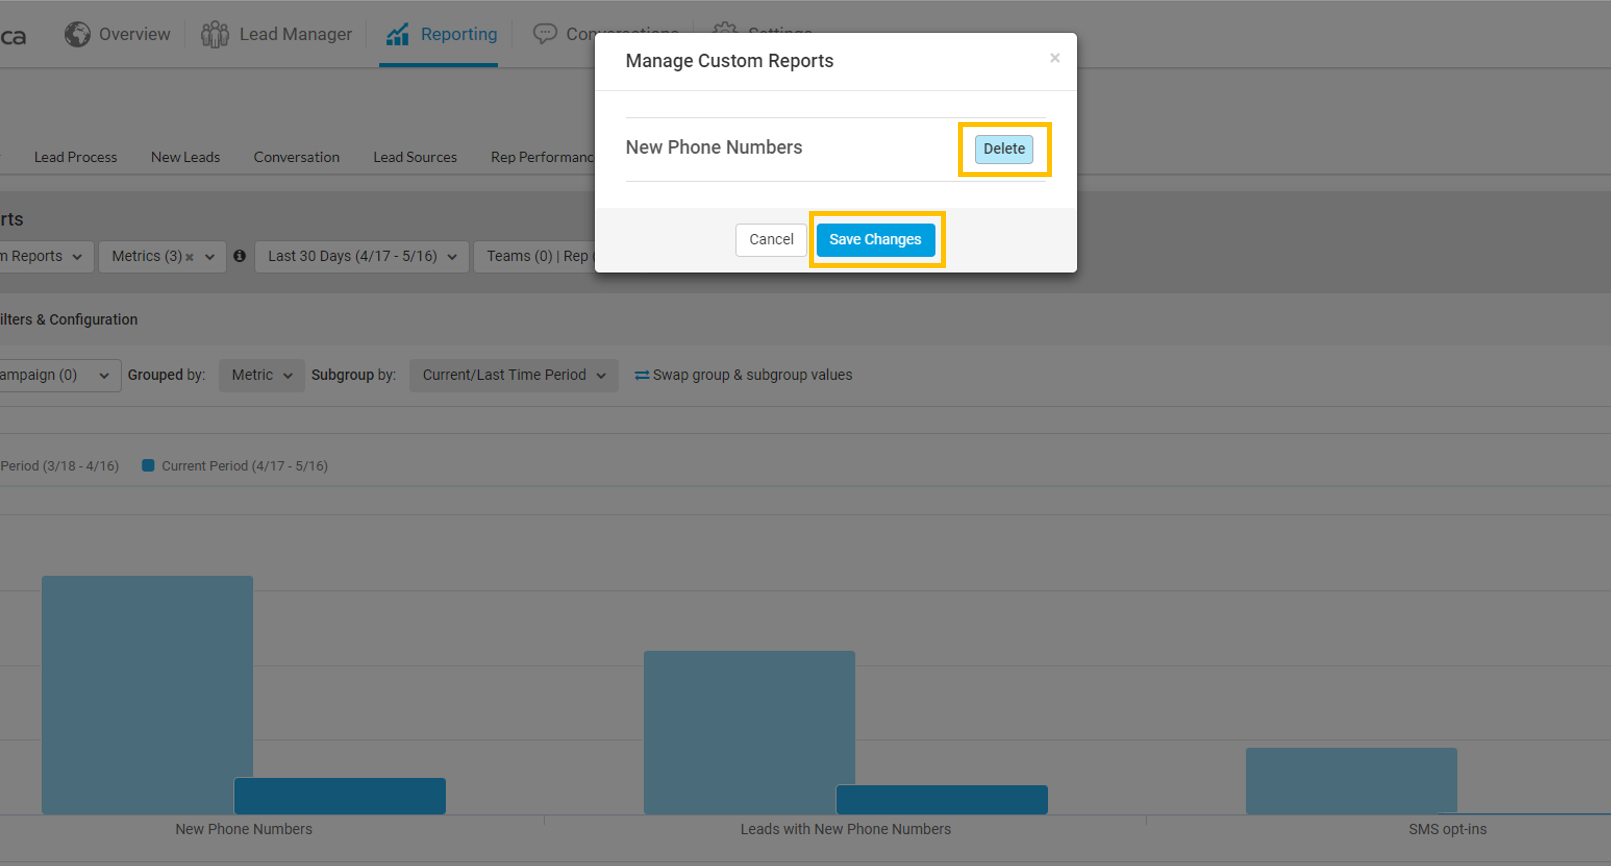
- The Manage Custom Reports screen appears. Select the report you wish to delete and click Delete.
- Click Save Changes.
To Edit a Custom Report:
- Navigate to the Reporting module in Conversica's dashboard.
- Select Custom Reports from the drop-down menu. This will automatically take you to the last custom report you've viewed.
- Navigate to the Report menu select the custom report you wish to edit from the list of reports stacked below Manage Custom Reports.
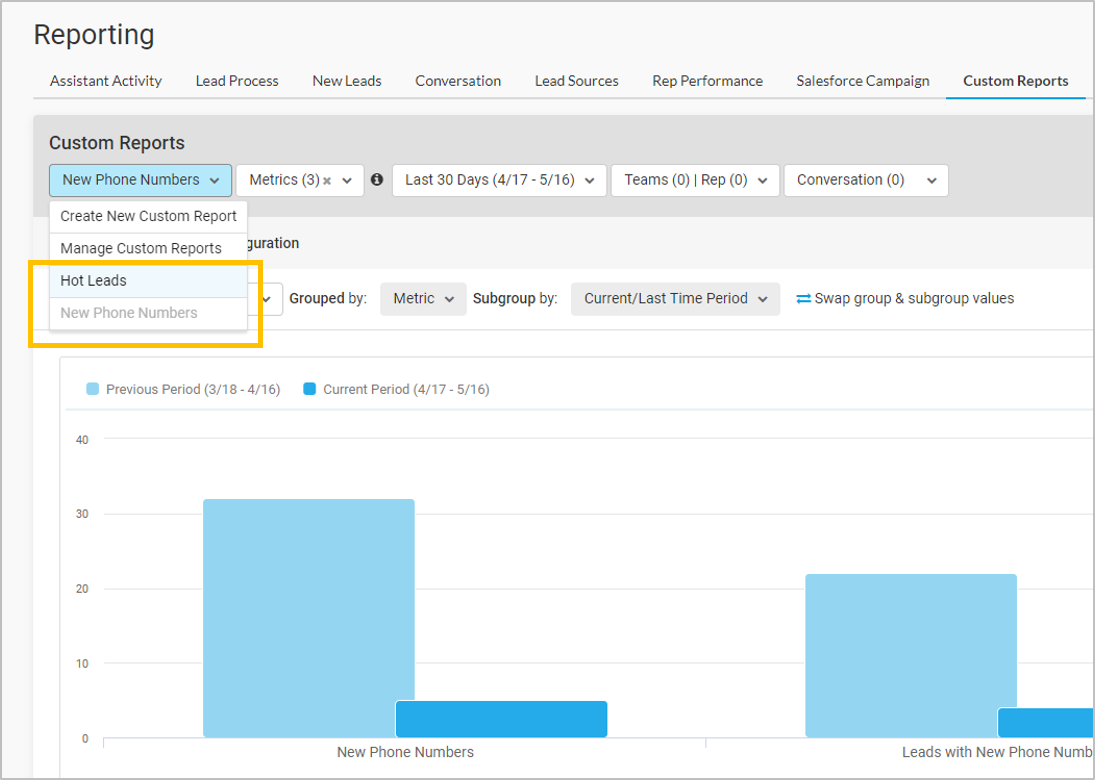
- This will populate the report. To edit, make your desired changes to the report's current configuration and click Save As.
Comments
0 comments
Article is closed for comments.