
The Lead Status Management tool empowers you to customize which Conversica Lead Status applies to a lead when they respond during a particular stage of a conversation.
With this tool, you can streamline your processes and train your Revenue Digital Assistant™ (RDA) to categorize a response to trigger a corresponding alert.
Overview of the Lead Status Management Tool
If you have a list of leads so valuable that every response should be categorized as a Hot Lead or if you want a specific response from your leads labeled as Lead to Review to ensure it receives the attention it requires from your representatives, the Lead Status Management tool has you covered.
For any conversation or lead list, you can choose from among these Conversica status options for each response category, allowing you to decide which status should be applied to a given response:
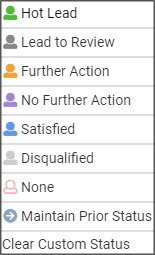
- Hot Lead
- Lead to Review
- Further Action
- No Further Action
- Satisfied
- Disqualified
- None
- Maintain Prior Status
- Clear Custom Status
Revenue Digital Assistant for Automotive Service available statuses:
- Interested
- Response to Review
- Customer at Risk
- Satisfied
- Disqualified
- None
- Maintain Prior Status
- Clear Custom Status
Every time a lead responds to one of your Revenue Digital Assistant's messages, your RDA will read and interpret the response, placing it in the appropriate Response Category. These categories define the next message that your RDA will send to the lead as well as the status (if any) that should be applied to a given response.
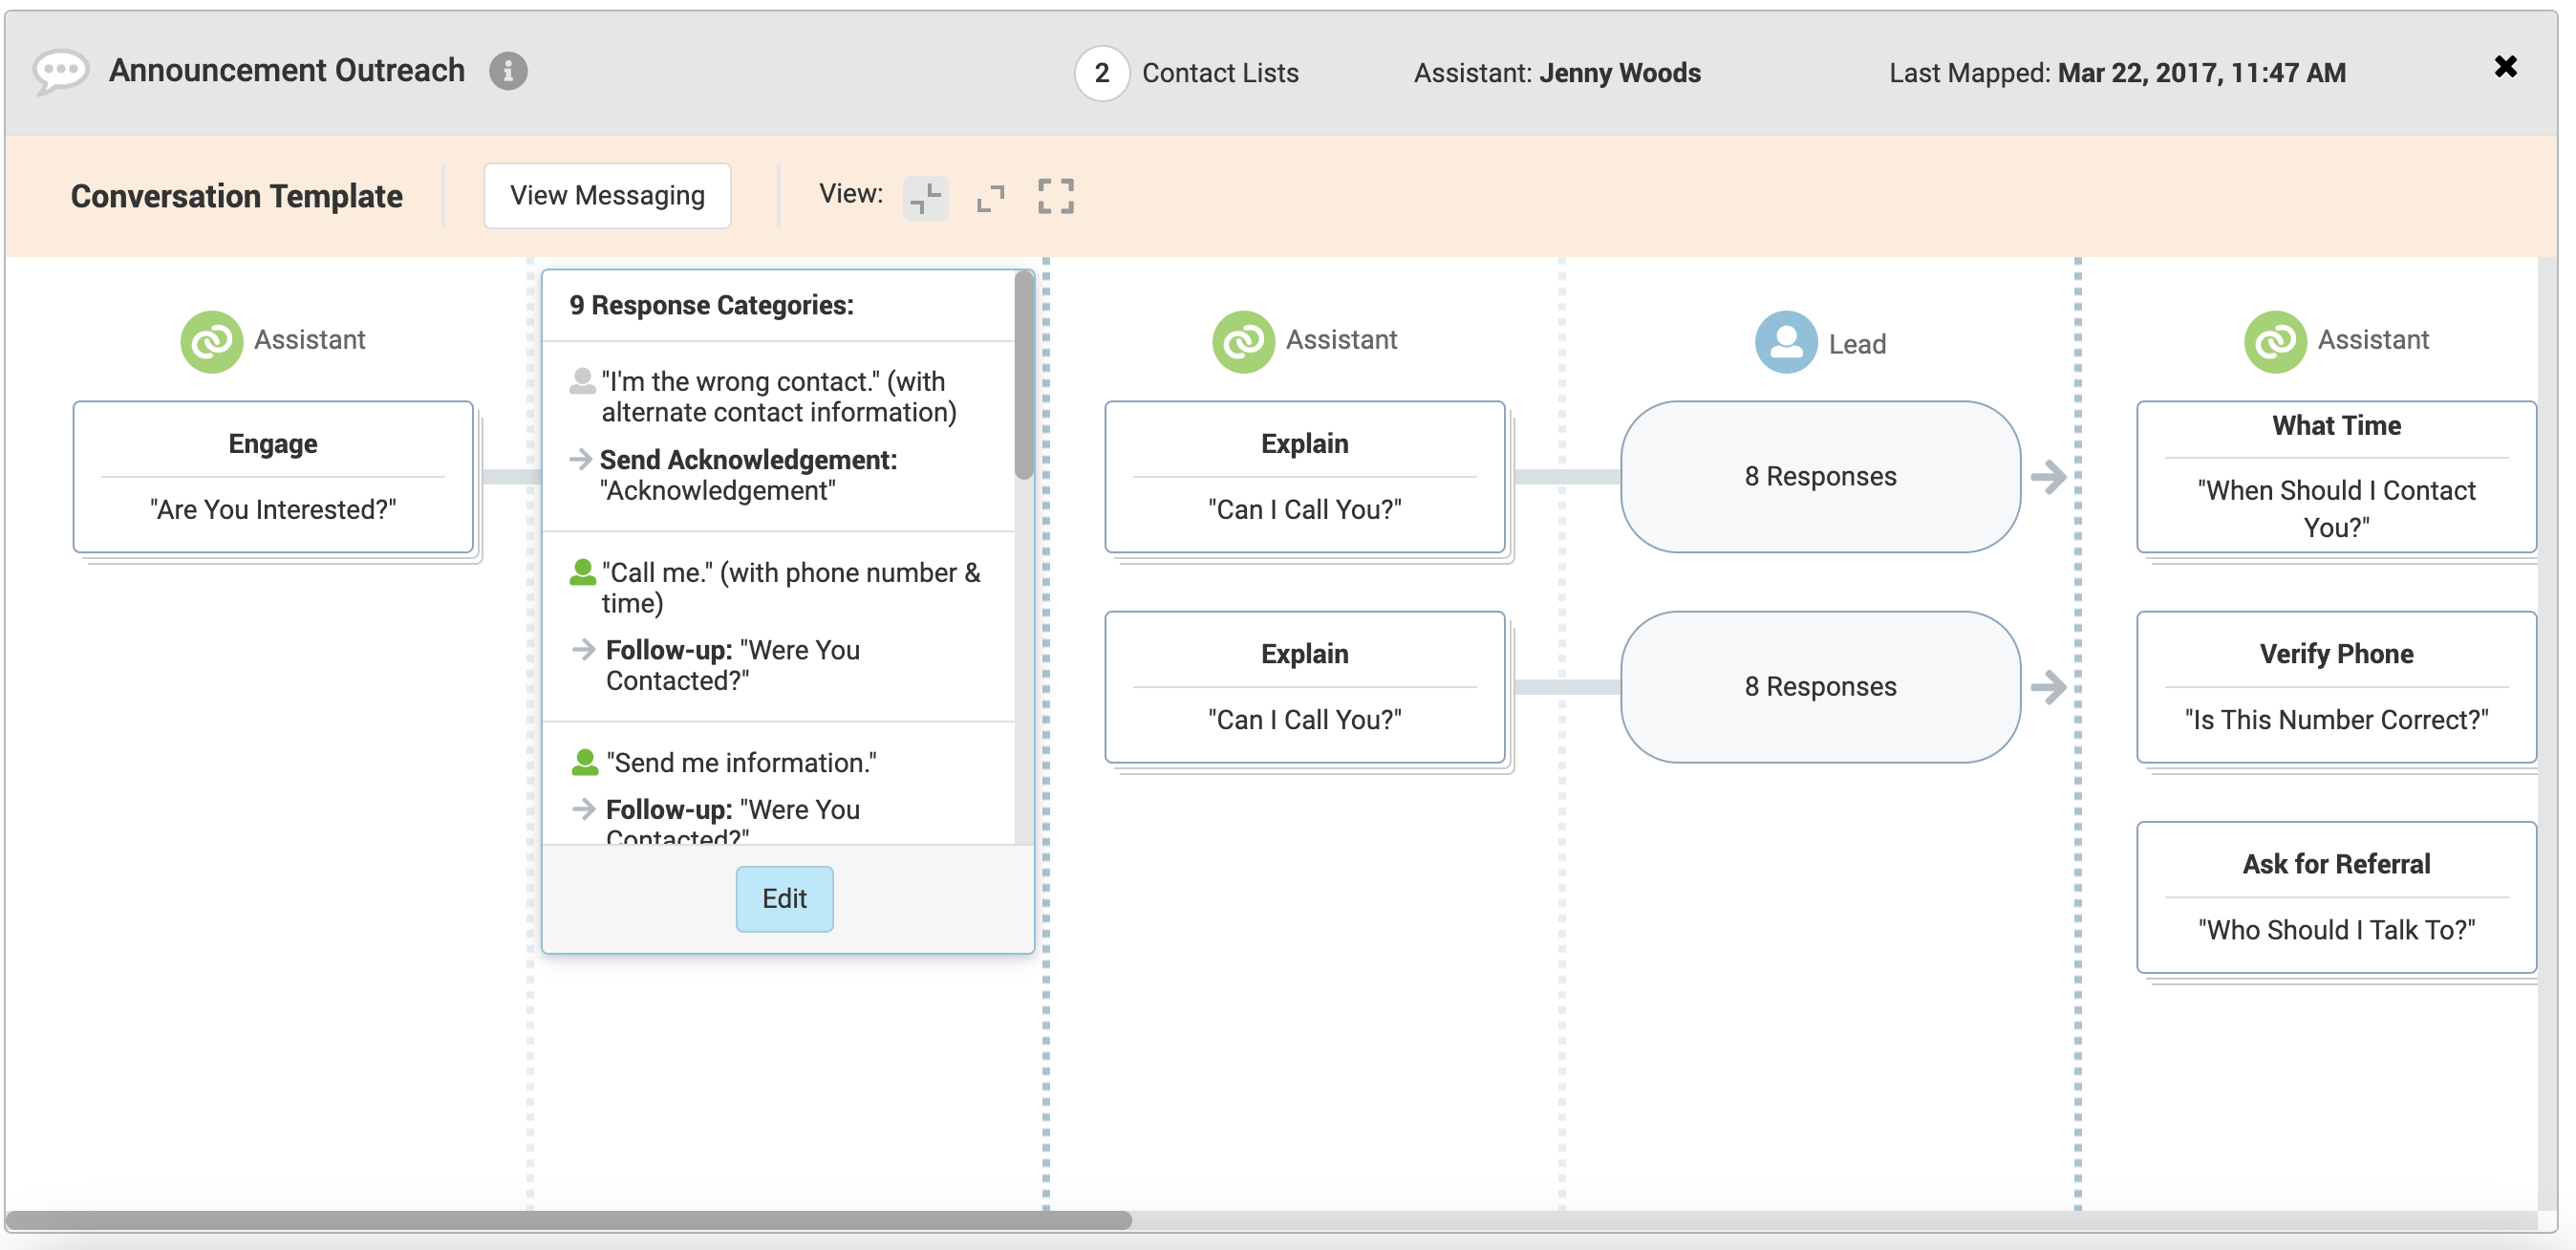
With the Lead Status Management tool, you can select the Lead Status that you want to have applied (or not applied) when a certain response is received in a given exchange. We’ll show you the status that we’ve trained your RDA to apply, and then give you the opportunity to choose a different one that suits your workflow better.
Permissions
Users with permission to edit conversations will also have access to the Lead Status Management feature. If you are a Conversica Admin (or Manager with Admin permissions) follow the steps in our How to Activate the Conversation Editor article to easily activate the feature for new or existing profile members.
How to Set Custom Lead Statuses
Follow these steps to set custom Lead Statuses from the available Response Categories of a specific Exchange at both the Conversation and individual lead list level.
How to Set Custom Lead Statuses on the Conversation Level
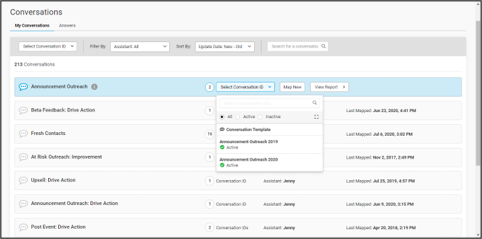
1. From the dashboard, click Conversations > Conversation Editor.
2. Select the conversation you want to set custom Lead Statuses for.
3. Hover over the Lead Response Category you want to edit, click Edit.
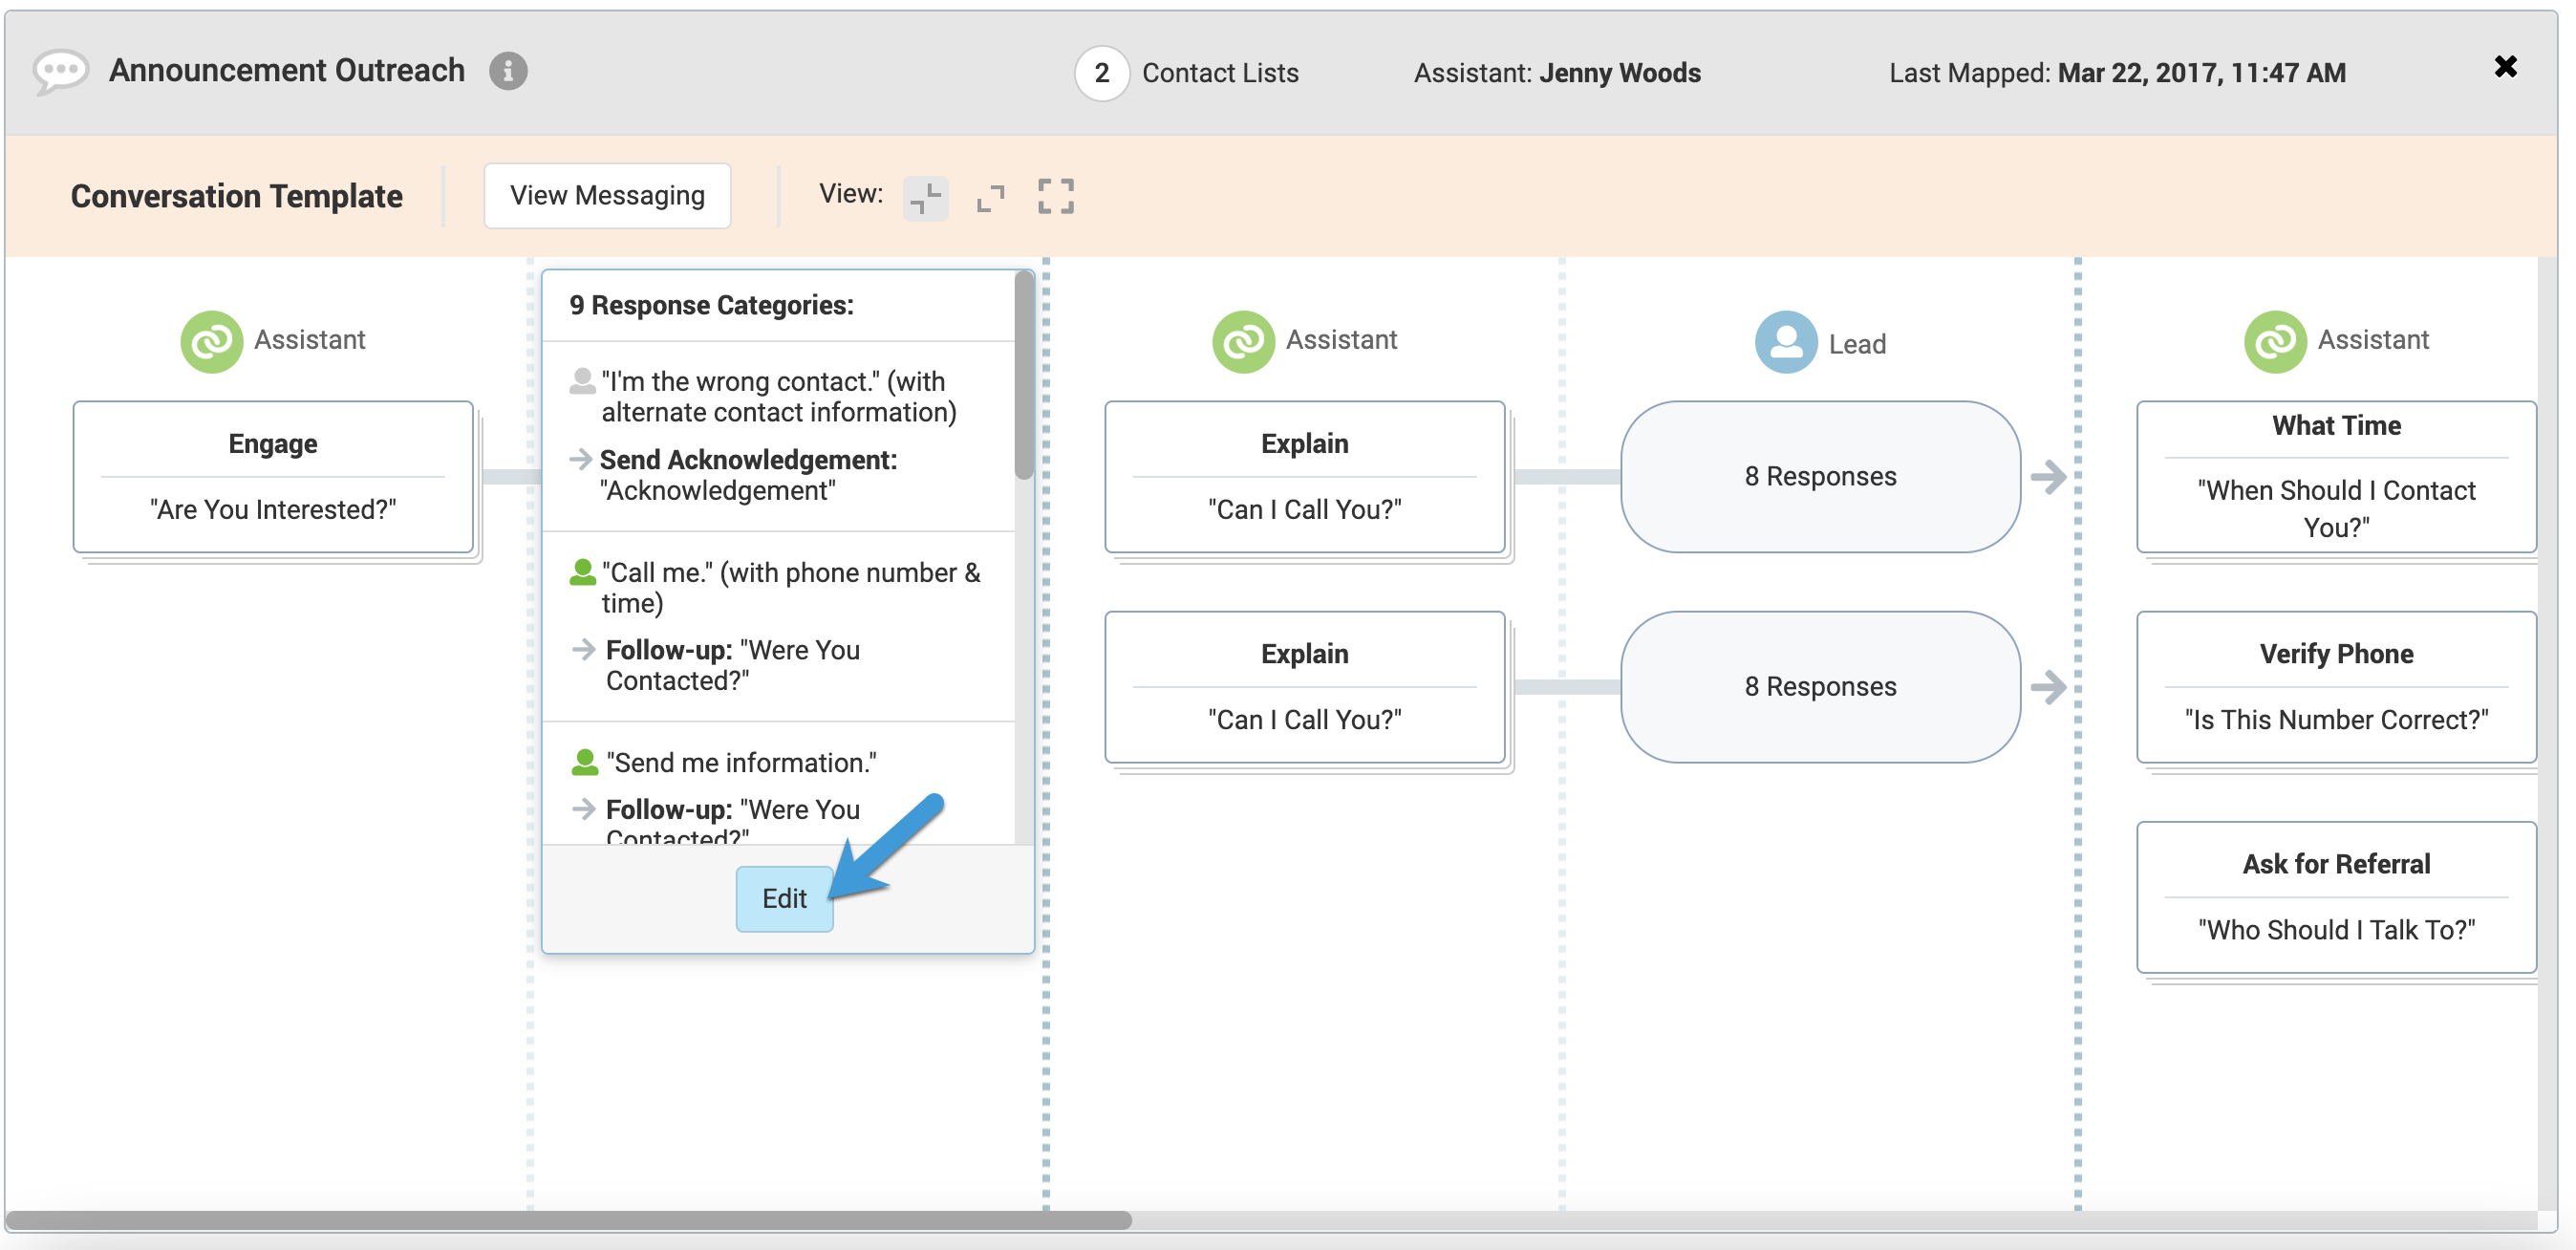
- To see a complete road map of the conversation, including all of the Response Categories for each exchange, select the Expand View
 icon.
icon. - Hover over the Response Category you want to edit and click Review/Edit.

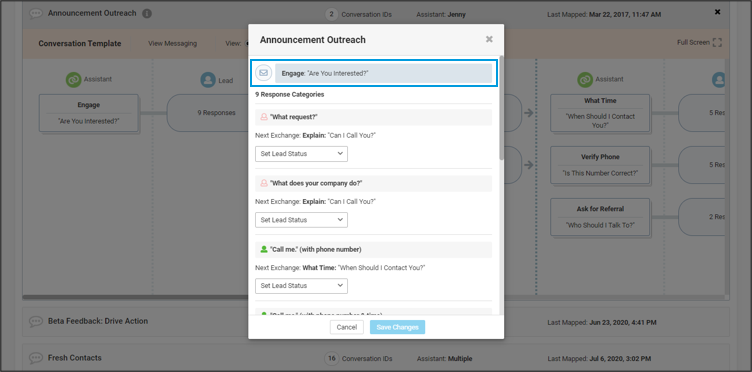
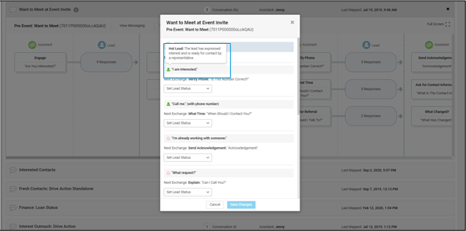
4. Each Response Category will have an example of a typical response from a lead followed by an example of the message your Revenue Digital Assistant will send out if that kind of response is received.
- The previous exchange will be listed at the top.
5. The person icon next to the Response Category displays the current status (if any) that the RDA is trained to assign to this kind of response.
- Hover over the icon to display the status and its definition
6. Each Response Category will have an example of a typical response from a lead followed by an example of the message your RDA will send out if that kind of response is received.
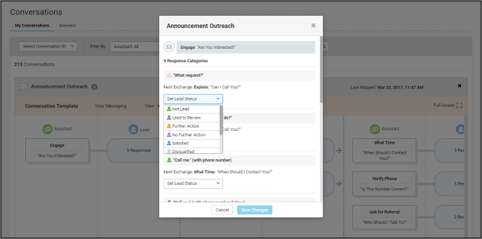
7. To edit the Lead Status to be applied, click the Set Lead Status drop down and choose from the list:
- Lead Status Options:
- Current Statuses include Hot Lead, Lead to Review, Further Action, No Further Action, Satisfied, and Disqualified.
- For RDA for Automotive Service sub: Interested, Response to Review, Customer at Risk.
- A lead’s status can also be set to None, which is equivalent to no status.
- Maintain Prior Status sets the Lead Status to the prior status that was assigned in the last exchange, i.e. this new response will not change the status of the lead even though the RDA has received and understood the response and may continue to message your lead.
- Clear Custom Status clears any custom statuses and reverts to the original status that Conversica trained your RDA to apply out-of-the-box.
- Current Statuses include Hot Lead, Lead to Review, Further Action, No Further Action, Satisfied, and Disqualified.
8. Repeat these steps for all of the response categories you desire to customize.
9. Then, click Save Changes.
- This will immediately change how your RDA handles all responses received from that point forward, including conversations with leads that have already been engaged.
How to Set Custom Lead Statuses on the Lead List Level
1. From the dashboard, click Conversations > Conversation Editor.
2. Select the conversation you want to set custom Lead Statuses for.
3. Click the drop-down to select the list you want to edit.
4. Hover over the Lead Response Category you want to edit and click Edit.
- To see a complete road map of the conversation, including all of the Response Categories for each exchange, select the Expand View icon.
- Hover over the Response Category you want to edit and click Review/Edit.
5. Each Response Category will have an example of a typical response from a lead followed by an example of the message your RDA will send out if that kind of response is received.
- The previous exchange will be listed at the top.
6. The person icon next to the Response Category displays the current status (if any) that the RDA is trained to assign to this kind of response.
- Hover over the icon to display the status and its definition
7. To edit the Lead Status to be applied, click the Set Lead Status drop down and choose from the list:
- Lead Status Options:
- Current Statuses include Hot Lead, Lead to Review, Further Action, No Further Action, Satisfied, and Disqualified.
- For RDA for Automotive Service sub: Interested, Response to Review, Customer at Risk.
- A lead’s status can also be set to None, which is equivalent to no status.
- Maintain Prior Status sets the Lead Status to the prior status that was assigned in the last exchange, i.e. this new response will not change the status of the lead even though the RDA has received and understood the response and may continue to message your lead.
- Clear Custom Status clears any custom statuses and reverts to the original status that Conversica trained your Revenue Digital Assistant to apply out-of-the-box.
- Current Statuses include Hot Lead, Lead to Review, Further Action, No Further Action, Satisfied, and Disqualified.
8. Repeat these steps for all of the response categories you desire to customize.
9. Then, click Save Changes.
- This will immediately change how your RDA handles all responses received from that point forward for this specific list, including conversations with leads that have already begun.
FAQ
Q: What happens if I try to change the Lead Statuses at the Conversation template level but there are list level customizations already in place?
A: When changing Lead Statuses at the Conversation Template level, you will be alerted if custom statuses are set at the lead list level for that particular Transition. This gives you the opportunity to decide if you want to wipe out your customizations by continuing or stop and make your changes on the list level instead:
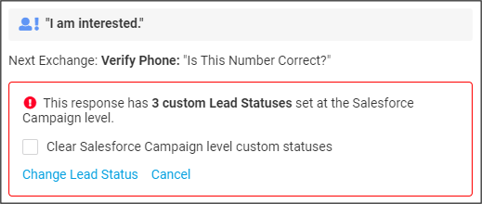
In another tab, review the custom Lead Statuses in place on the individual lead lists, and then, if you want to overwrite (clear) the custom statuses, click the checkbox and select “Change Lead Status” link.
Q: When reviewing current Lead Statuses how can I tell which ones have been edited previously?
A: When a custom status is set the icon displays an exclamation point denoting it is customized and not how Conversica originally trained your Revenue Digital Assistant to behave. If you hover over the icon, you’ll see that the status has been customized as well as the status your RDA would have applied out-of-the-box.

Comments
0 comments
Article is closed for comments.