Why Should I migrate to Conversica's Enhanced DNS?
Conversica's Enhanced DNS offers a higher level of domain encryption and email deliverability.
*(Note this is a free upgrade as part of your Conversica service)
How to Send this to your IT team to Migrate your Subdomain
If you are not sure what is involved to migrate to Conversica's Enhanced DNS and you need to just send this off to your IT team to configure, you can send them a link to set up the domain and the DNS records they need to add.
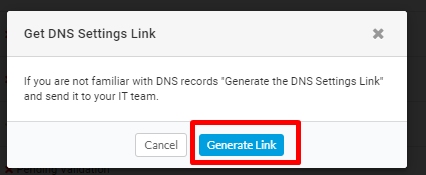
In your DNS Settings on the right-hand side click "Generate DNS Setup Page Link" and then "Generate Link". You will then copy and paste the link that is generated and send it to your IT team as well as this Help Center article to allow them to create and validate the subdomain on your behalf.
Step 1: Find Generate DNS Setup Page Link in DNS Settings.

Step 2: Click Generate Link.

Step 3: Copy and paste the link that is generated to your IT team as well as this Help Center article to allow them to create and validate the subdomain on your behalf.

How to Migrate your DNS Records from Legacy to Enhanced
NOTE - Interfaces and nomenclature may vary between different domain hosting services; use this document as a guideline while creating your records, but refer to your hosting service in the event of any deviation.
Step One - Find Legacy Subdomain and add CNAME Verification Records
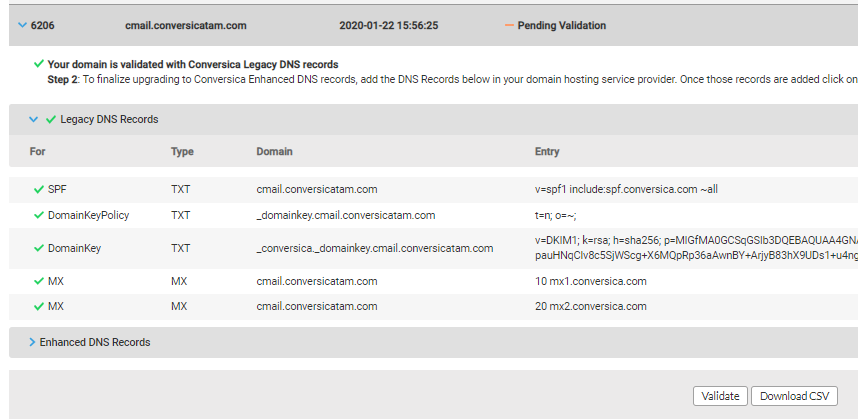
A) Go to the DNS Settings link in your Conversica dashboard, and click on any domain ID that shows the image of "Validated (Legacy).

B) Click into the domain ID you just added and you should see the 6 DNS records. There are 3 TXT records, 2 MX records, and 1 CNAME record that you will need to ensure are added to your DNS Hosting Service. 5 of them will likely already be validated, and you will likely just need to add the Verification CNAME record.
C) In your DNS hosting Service you will need to confirm that all 6 records are configured as necessary. You will need to add a new record and select CNAME for type, then enter the following values:
- Host - enter the value under Domain from the "DNS Settings" page.
- Points to - enter the value under Entry from the "DNS Settings" page.
D) In your Conversica DNS Settings, you will then click the "Validate" button. If you get all green checkmarks, you can then move on to step 2 below to add the DKIM, FBL SPF, FBL MX, and Links records. If you get a red ‘X’, that indicates there was an error when validating. Please confirm your record entries are correct. Please note it could take up to 48hrs for new or modified DNS records to validate.

Step Two - Create Enhanced DNS Records
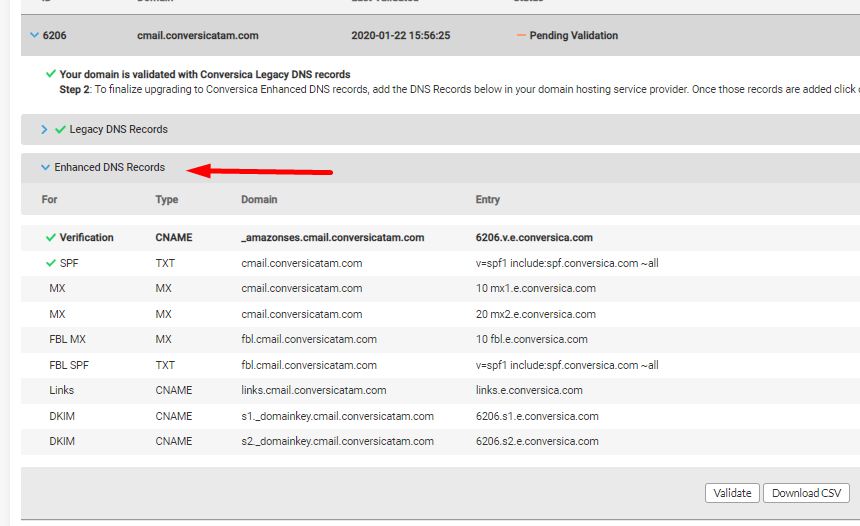
After all of the Legacy DNS Records have validated, we can now move on to step 2 to add the Enhanced DNS Records. You will click into "Enhanced DNS Records" for the Domain ID you just added the Verification Record for, which will show the new Records you need to add.

A) Access DNS management through your DNS hosting service.
B) Add a new record and select TXT for type, then enter the following values:
- Host - enter the value under Domain from the "DNS Settings" page.
- TXT - enter the value under Entry from the "DNS Settings" page.
- Please note we do not allow for SPF Macros to be used when configuring a TXT DNS record, and the record itself must contain "conversica.com".
NOTE - This step is performed for the following records: SPF and FBL SPF
C) Update the 2 legacy MX records for the sending domain with an updated entry value:
- Points to - edit the address string under Entry from mx1.conversica.com to mx1.e.conversica.com, and mx2.conversica.com to mx2.e.conversica.com.
- Host - ensure the legacy MX record has the value under Domain from the "DNS Settings" page.
- Priority - ensure the legacy MX record has the priority value under Entry from the "DNS Settings" page.
D) Add a new record for FBL MX and select MX for type, then enter the following values:
- Host - enter the value under Domain from the "DNS Settings" page.
- Points to - add the address string under Entry as fbl.e.conversica.com from the "DNS Settings" page.
- Priority - enter the numerical value under Entry from the "DNS Settings" page..
NOTE - This step is performed for the following records: 2 MX Records and FBL MX
E) Add a new record and select CNAME for type, then enter the following values:
- Host - enter the value under Domain from the "DNS Settings" page.
- Points to - enter the value under Entry from the "DNS Settings" page.
NOTE - This step is performed for the following records: Verification, Links, and 2 DKIM Records
F) Once all records have been entered, click the Validate button found on the page from the "DNS Settings" page.
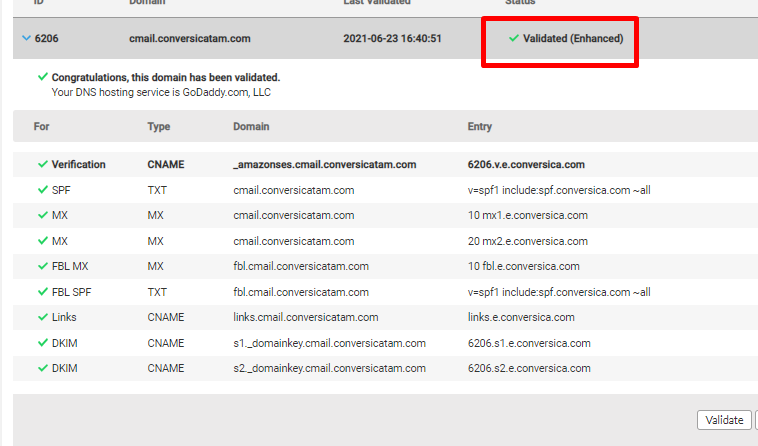
G) A green checkmark will display for each record that has been entered correctly.
H) A red ‘X’ indicates there was an error when validating. Please confirm your record entries are correct. Please note it could take up to 48hrs for new or modified DNS records to validate.
Once you have 9 Green Checkmarks (2 TXT Records, 3 MX Records, and 4 CNAME Records) you have migrated to the Enhanced DNS with a higher level of security and enabled your account to report on link tracking when that feature is available.

Comments
0 comments
Please sign in to leave a comment.