This document will walk you through the process of creating public and private key pairs. For instructions on logging into your SFTP directory, please see this article.
To Navigate to operating system specific instructions for creating SSH keys, please click one of the links below.
Creating SSH keys in Windows
- Download and run PuTTYGEN. PuTTYGEN is included with WinSCP, but if you’re not using WinSCP, you can download a standalone version.
- To run PuTTYGEN from WinSCP, click the Tools dropdown box and select Run PuTTYgen.
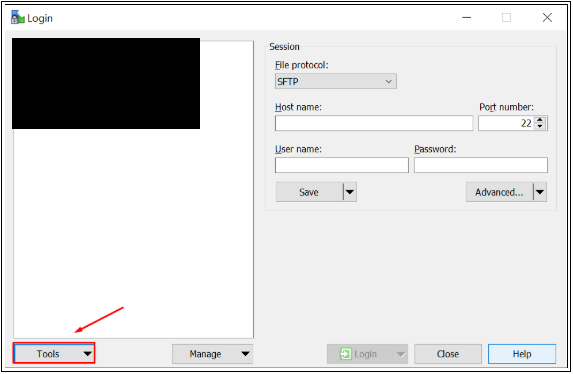
- To run PuTTYGEN from WinSCP, click the Tools dropdown box and select Run PuTTYgen.
- Select RSA.
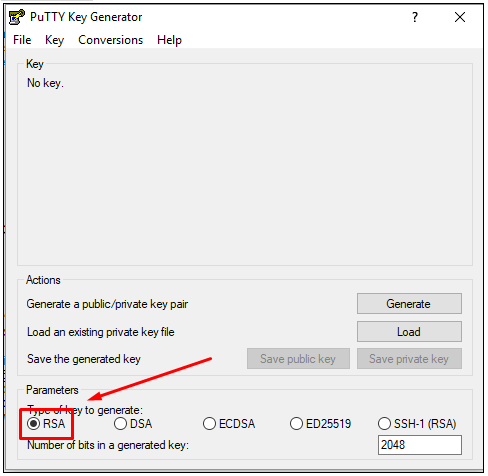
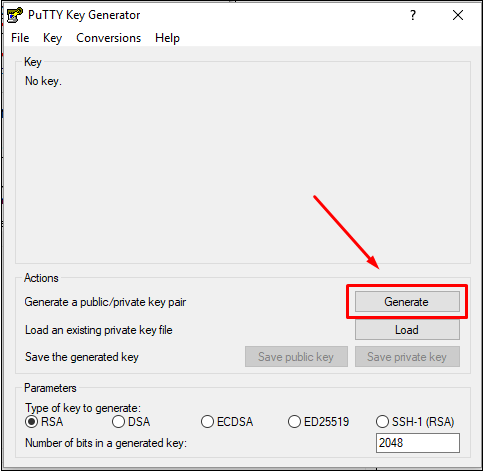
- Click the Generate button.
- Move your mouse pointer around in the blank area of the Key section, until the progress bar is full.
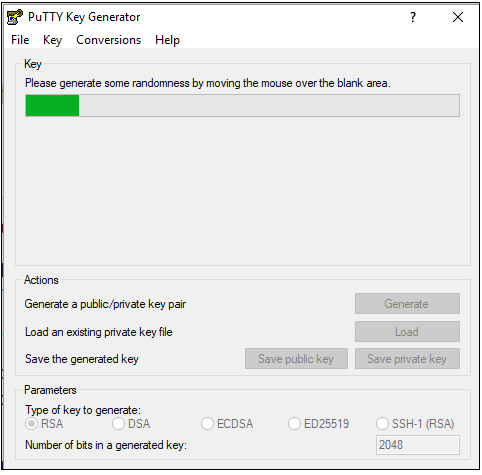
- Once the progress bar fills, the key is generated and displayed.
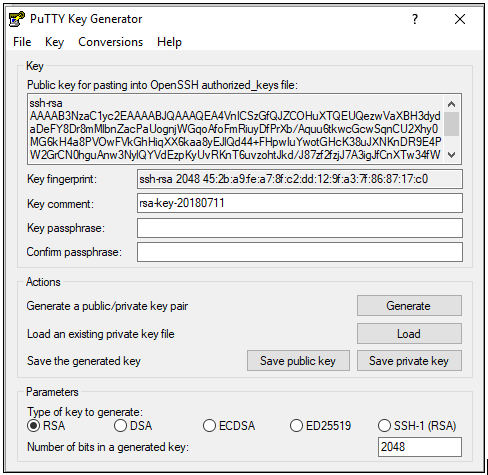
- You can enter a password into the Key Passphrase and Confirm Passphrase boxes for added security but it is not required. You will have to enter this password whenever you log into the SFTP server.
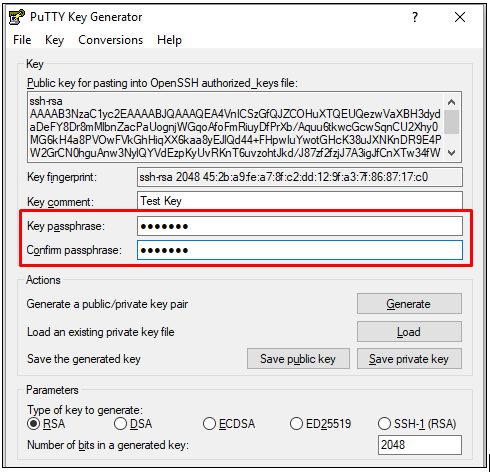
- Click the Save public key button and name your file. You can use any name you want, but you will want to use a descriptive name like “Conversica Public Key.”
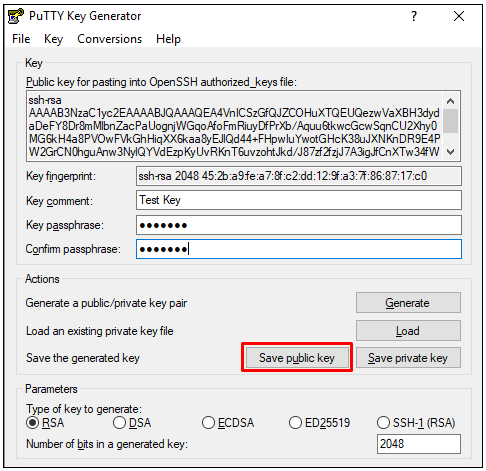
- Click the Save private key button and choose a file name. Make sure this private key is stored somewhere safe and it will not get lost. If something happens to this file, it will result in loss of access until a new public and private key pair can be made and the Conversica system can be reconfigured for the new credentials.
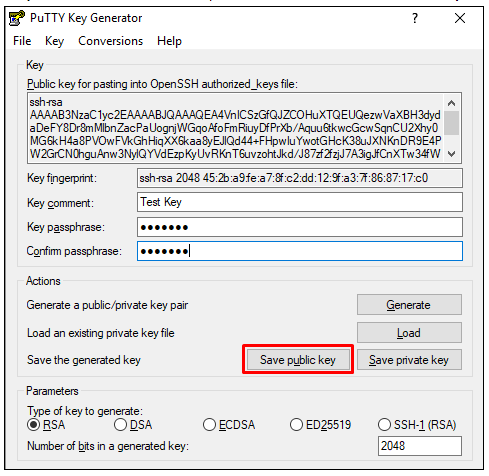
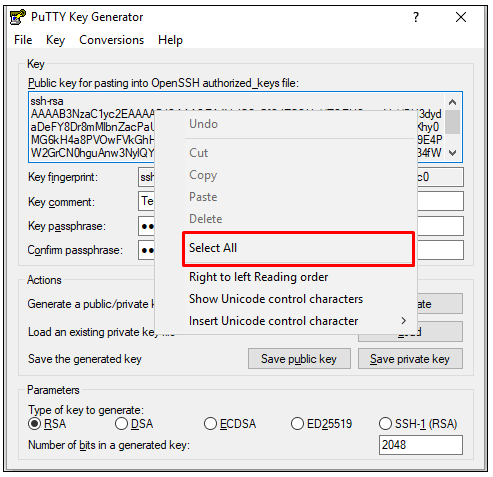
- Right-click in the text field labeled Public key for pasting into OpenSSH authorized_keys file and choose Select All.
- Right-click again once the text is highlighted in the same text field and choose Copy.
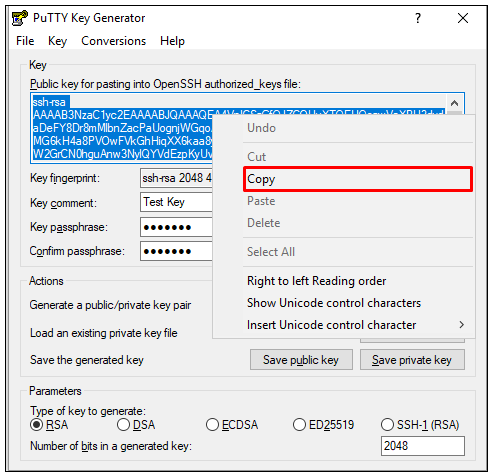
- Send the copied value to your TAM. The key should all be on one line and begin with "ssh-rsa AAAA ....”
Creating SSH Keys on a Mac
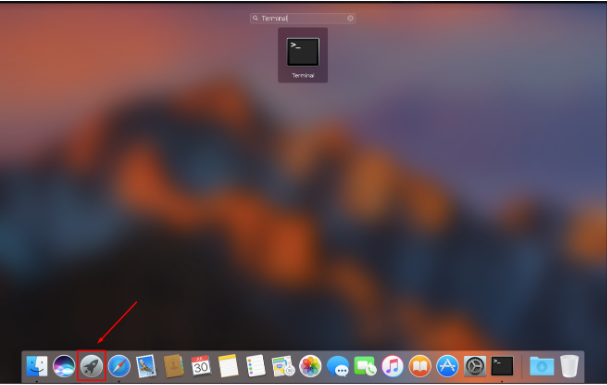
- Select Launchpad and type “terminal” and then click on the terminal icon.
- Type “ssh-keygen -t rsa” without the quotes.
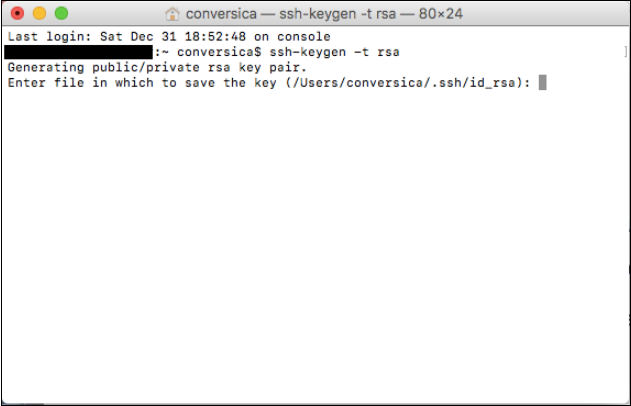
- You will be prompted for a location to save the key files. If you just press Enter it will save in the default location. The rest of these instructions are written as though you saved to the default location.
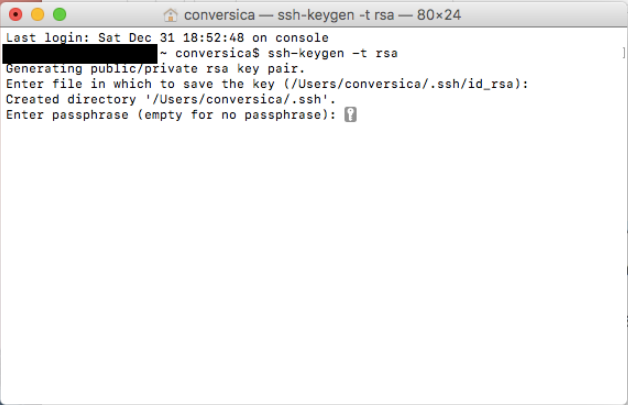
- You will be prompted for a passphrase. You can enter one or leave it empty. If you enter a password, you will need to enter it twice and the passphrase will need to be entered every time you log into the SFTP directory.
- Terminal will display a message giving the location of the new files and it will provide a key fingerprint and random art. You do not need the fingerprint or random art.
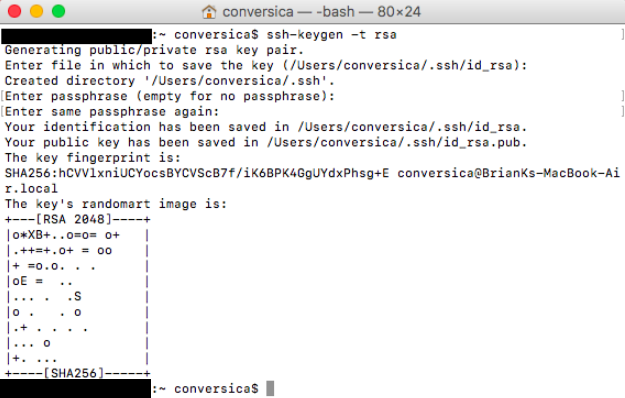
- Press Command + Shift + G and enter the location that terminal says the file was stored to go to the location where the key file was saved.
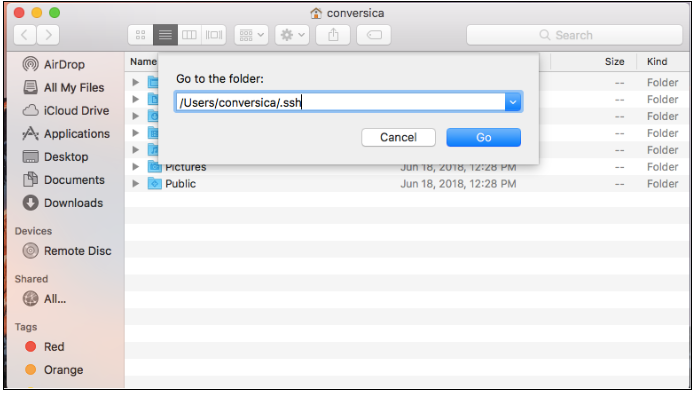
- Copy the .pub file to an email and send it to your TAM.
For instruction on Logging into your FTP or SFTP directory, please see How to Log into an FTP or SFTP Directory document.
Comments
0 comments
Article is closed for comments.